Have you dreamed of creating a terrace with a built-in Nordic bath in your garden? Or maybe you already have a spacious deck ready for a sunken hot tub to turn into your own wellness retreat? In this article, we’ll walk you through the key steps to make that dream a reality.

Step 1: Choose the Right Hot Tub Model
Start by selecting the sunken hot tub model that best suits your space. You can compare all available options and dimensions in the technical datasheets. These provide the full measurements and setup details essential for proper planning.
Step 2: Prepare the Terrace Space
When designing your terrace, leave a dedicated space based on the chosen model’s dimensions. A simple way to visualize the cutout area is by using cardboard to measure and mark the required space before construction begins.
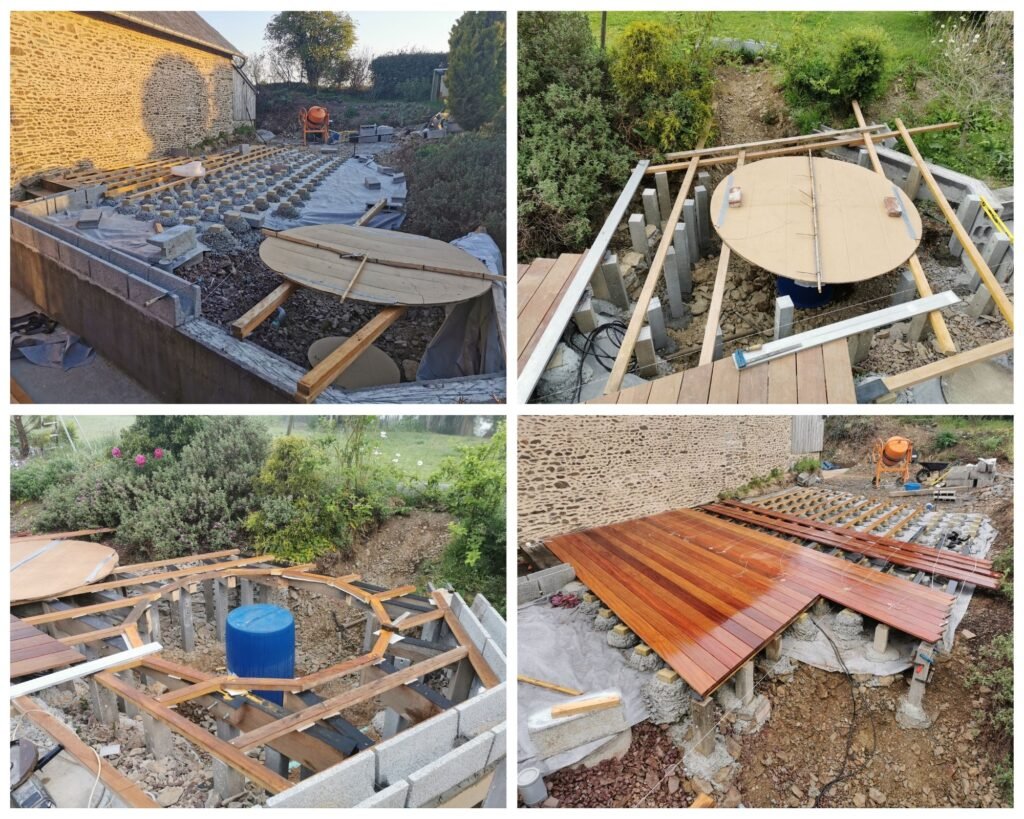
If you already have a deck, you can cut out a circular opening of the right size to insert your sunken hot tub seamlessly.

Step 3: Support & Weight Considerations
A filled hot tub with bathers can weigh over 1000 kg, so it must rest securely on a stable base rather than hanging by the terrace edges. Most TimberIN sunken tubs come with a wooden support frame—no extra support needed for installation.
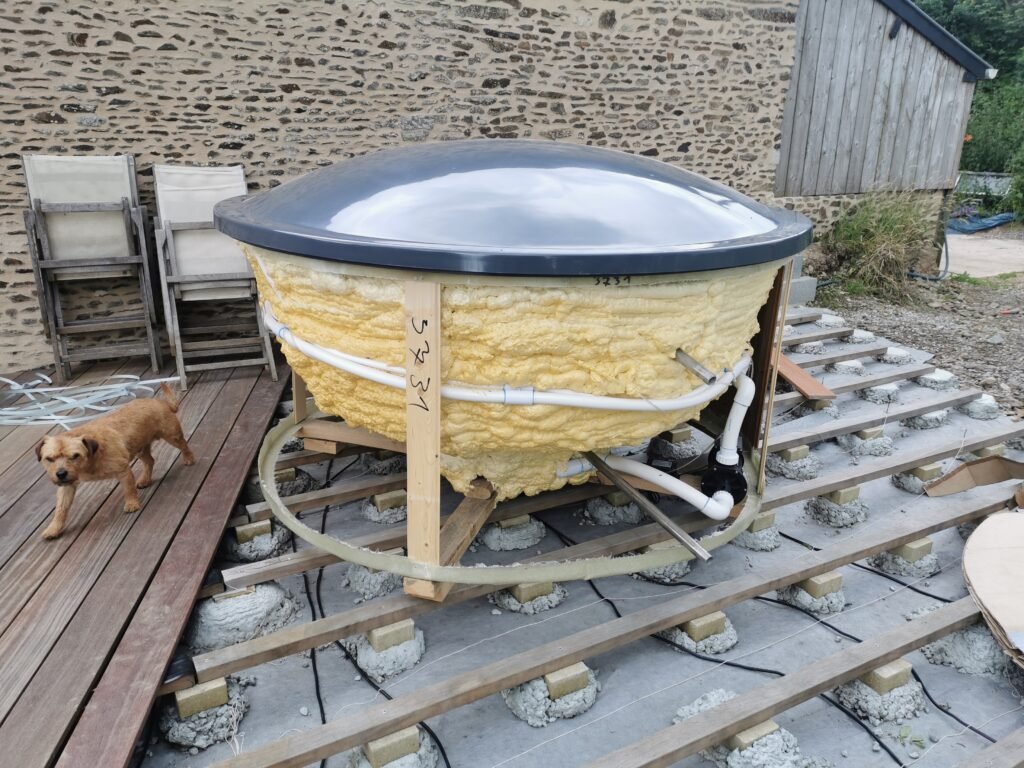
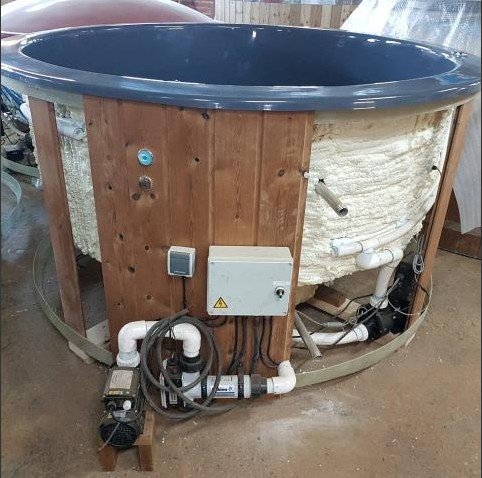
Step 4: Plan for Stove, Heater & Accessories
If your tub includes accessories such as a wood stove, electric heater, massage jets, or filtration system, ensure easy side access for maintenance and servicing. These components are typically mounted around the exterior of the tub.
For an external stove, the hose length is about 70 cm, and the stove should be positioned at the same level as the hot tub. For an electric heater, additional wooden panels are added, allowing the unit to sit securely next to the tub.
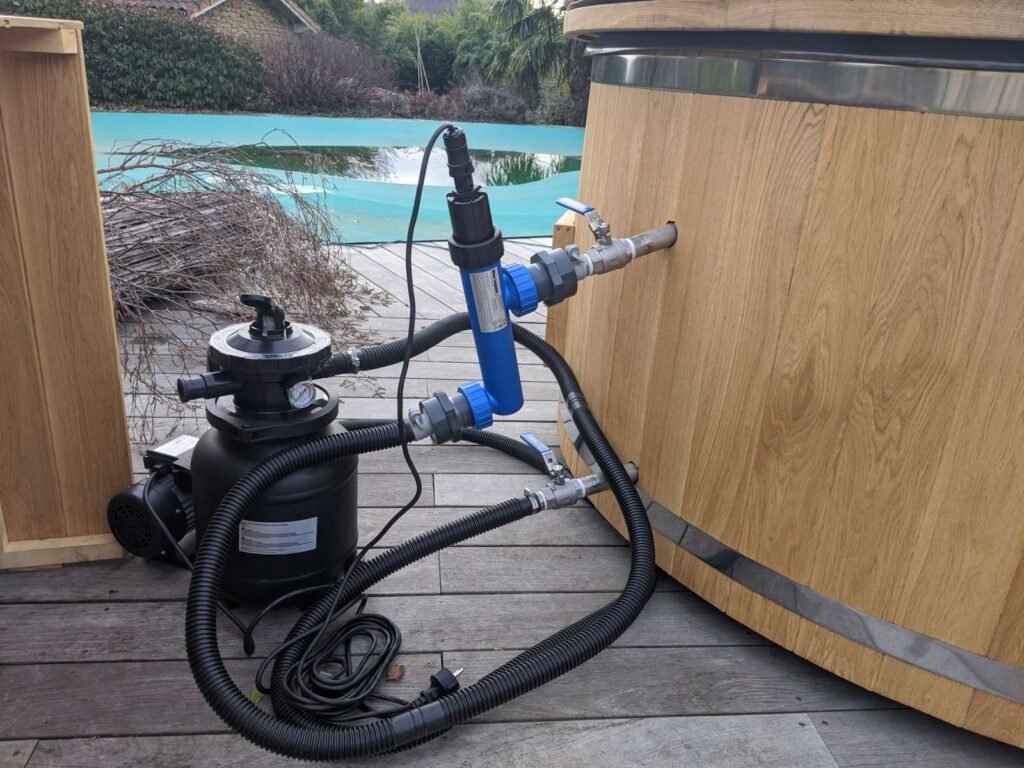
Step 5: Install a Filtration System
To maintain clean and hygienic water, a filtration system is highly recommended. Changing 1000+ liters after each use is costly; a sand filtration system keeps the water fresh for 1–3 months. It plugs into a standard electrical socket and, when used with water disinfectants, ensures crystal-clear water.
Step 6: Water Drainage Options
Choose your preferred water drainage system: standard plug drain, external tap, or a tap with a quick garden hose adapter. Learn more about drainage and connection options here.

Step 7: Level and Final Setup
Before installation, ensure the ground surface is level and free of debris. Once everything is ready, sink your hot tub, connect the accessories, fill it with water, and enjoy your private spa corner at home!
FAQ – Built-In and Sunken Hot Tubs
Do I need additional support for a sunken hot tub?
No. TimberIN sunken tubs include a wooden support frame that ensures full stability without extra construction.
Can I use an external stove or electric heater?
Yes. Both options are compatible. The stove should be on the same level as the tub, while electric heaters are installed on added wooden boards.
How do I keep the water clean?
Use a sand filtration system combined with water disinfectants. This setup allows you to change water every 1–3 months instead of after every use.
What drainage options are available?
Choose between a plug drain, external tap, or quick-connect garden hose adapter.
Do I need professional installation?
Not necessarily. Follow this guide for DIY installation, or contact a carpenter for custom decking and finishing work.